I've decided to run with my fruit bags and grid idea because it's the one that excites me most. My plan is to develop some grids and and experiment with netting backing and see how they work together.
My first task is to test my fruit bags to see how they react to being heated with an iron. The previous heating was with a laminator and I feel it might be a bit different this time.
When I got my stash of fruit nets out I realised they are far from uniform. The images below show a selection and they way they behaved when ironed between baking parchment. Each pair started off the same size - it's pretty obvious which are the heated ones.
 |
| This retained it's integrity but became smaller |
 |
| This just shrank in every direction |
 |
| This sort is what I used in the laminator and it crisped to a frazzle |
My colours are limited by the fruit bags available but I spotted some scourers in the supermarket and thought they might work.
 |
| Colourful scourers |
 |
| Scourers no longer |
I heated them in the same way but left some of the scourer more curled up - again the pieces started off the same size.


Whist these shrunk a bit they retained their rolled up shape and merely flattened. The pink one was more spread out and makes it look as though the scourers could be useful if I could flatten them a bit. In my laminator work I used layers of netting and there were no gaps. I think the same approach is needed here as well.
There were some tiny bits of plastic scraps on my table so I heat treated them:
 |
| Little pieces of plastic make a lovely pattern |
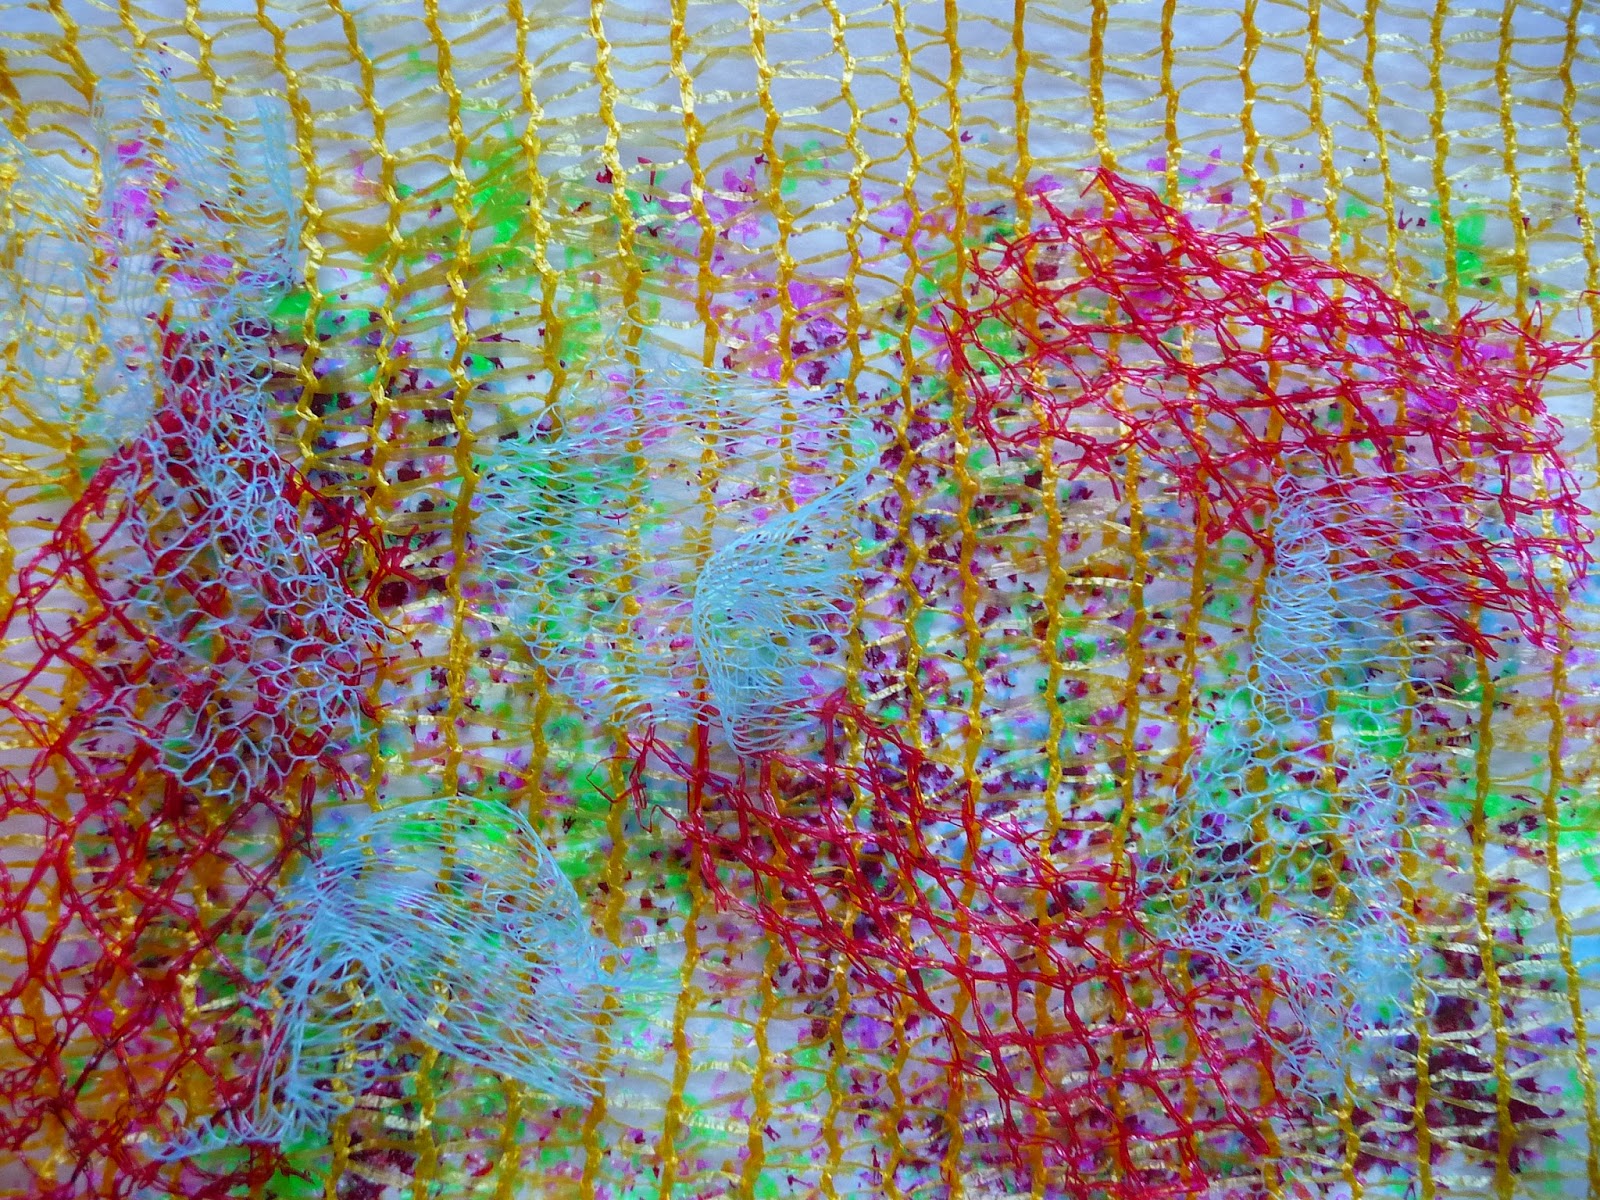
I cut some single thickness pieces of scourer and all they did was roll up and I knew from my previous test this made too thick a material. I tried standing it it really hot water but it made no difference. I decided to lay some soft red netting down and place the scourer on top and see what transpired.
The scourer made a long hard ribbon and the soft netting fragmented as it had previously. It's the fragmentation that I really like.
 |
| Soft red netting and scourer |
I used some double thickness scourer because it seemed to stay flatter.
 |
| Double thickness scourer still wants to roll up |
This is far less interesting, with little by way of texture. It took a really hot iron but at last I got some fragmentation but it's not nearly as good as the fruit nets.
 |
| High heat - some fragmentation |
The way the colours combine is good but it's too hard, in fact it's rigid.
I've spent a long time this evening looking online for soft net bags in a variety of colours but no luck I'm afraid.
I've thought about this overnight and decided to try something a little different. I really want the bright colours of the scourers but without the rigidity. Additionally I want the fragmentation of the fruit nets. The scourers need a very high heat to melt them and the fruit bags considerably less. So I think a two stage process is called for.
I snipped tiny fragments such as I used before.

Then melted them on a high heat:

This left me with a piece that wouldn't peel off the parchment; fortunately it didn't need to because I overlaid it with other sorts netting requiring less heat.
 |
| Against white paper |
 |
| Against white paper |
This is on a white paper background and is much more what I had envisaged although it hasn't all fused together. With a purple organza background (that was to hand) it takes on a more sultry persona:
 |
| On purple organza held up at a window |
If I place my paper grid on the top and hold it to the window it takes on the mysterious look of my original photo.

Now that I have a method of fusing my netting in a way I like I can make a plan. My layers will be;
grid
organza
fused nets/scourer
organza
My next trial will be to see if bondaweb is able to join my 3 lower layers together.
 |
| Bondaweb successfully joined my pieces |
It worked even if it was a bit fiddly. (There's a product called Misty Fuse which is like Bondaweb without the paper and I think that might make life a little easier). I used my successful sample and a single layer of pale pink polyester organza top and bottom. I placed my paper grid on top and held it to the window.
 |
| I like what I see |
Just like the original idea each pane offers something different. The organza gives a translucency. I see the air of mystery I was striving for but also the vibrancy of the stained glass window.
Next I need to consider how to make a grid. I've a couple of options
stitch into the organza/net
apply something to the top of the organza
I want a 3D effect so I'm choosing to make a grid and lay it on top. I'm thinking of
French knitting
knitted net
felting
I can give all of these a try quite simply because I have samples from my previous work. The knitted net will almost certainly be too pale but it will give me a good indication of whether it's a possibility.
French Knitting

I pinned the dark grey French knitting into a grid above my layered organza/netting. It certainly made "panes" but seemed very dominant and oppressive. There was a roundness to the knitting that was very different to the grid I was aiming at. I don't think this is the one.
Knitted net

Although the knitted net I used is a pale grey when I photographed it against the window it looked much darker so I've a good idea whether it would work. I think it may but with adjustments to the size of the net. I need a larger needle and probably heavier yarn. I have reservations too about the fact that the knitted net looks quite similar in structure to what lies beneath
Felting
I came across this lovely woven and felted idea but I'm afraid I haven't the expertise to pursue it.
 |
| http://www.weavingtoday.com/ |
However, it gave me the idea of making a piece of dark felt and doing cut outs. I'll sample with acrylic felt first. The pieces are A5.
I cut out panes with my soldering iron using my paper grid as a template and it gave a lovely irregular effect:

If I were to make felt it couldn't be cut in this way; I'd have to find a way to make the grid irregular.
I cut out panes with my soldering iron using my paper grid as a template and it gave a lovely irregular effect:
If I were to make felt it couldn't be cut in this way; I'd have to find a way to make the grid irregular.
Using my fused sample I stitched another piece of felt onto it then snipped into it to reveal the underneath. I caught the shapes I'd made with a stitch:
 |
| Horizontal slashes |
 |
| Diagonal slashes |
It's quite hard to get a good picture of these but this looks interesting, particularly the diagonal one. I feel tempted to touch which is always a good sign.
When I put light through them the 3D effects gets a bit lost:
 |
| Held against the window |
To me this looks a bit untidy and the black is certainly too heavy.
I think I'm going to go with the felt with plain cut outs but of course I may well change my mind by the time the felt is made.
Overnight I've dismissed the notion of making felt. I would be unable to achieve the jagged effect I got with acrylic felt and merino felt would give a soft feel (a bit like the French knitting). I've ordered some charcoal grey acrylic felt and in the meantime I'll work on my fusing.
Fusing the plastic
 |
| The hard plastic I used to make sprinkles |
 |
| Fused sprinkles |
 |
| Softer nets laid over the top |
 |
| The yellow stayed put but the red virtually disappeared |
 |
| I added more red and turned down the heat on the iron. |
I put one layer of purple organza behind the fused nets because I liked the effect earlier. The top layer is pale pink as in my sample. In the end I used Bondaweb and striped the paper off before placing it between my layers - it worked a treat.
 |
| This has the A5 felt overlay and is placed in a window. The charcoal grey will be A4 size |
Because there were more sprinkles than in my sample and a little more of the soft net this is more complex and I think I may have been a little extravagant with my plastic. It may look different when I put a bigger piece of felt grid over it and I can see more of the fused work.
 |
| My template with the panes cut out |
It's the reverse of the felt I'm interested in because it has lots of texture. I put my fused work in place and stitched around the edge with tiny stitches just to secure it. The only other stitching I used was around the edge leading away from the frame.
 |
| Securing the fused work |
These are photos of the completed work:
 |
| Showing the unsecured grid. This creates lots of shadows. |
 |
| My finished work |
I diffused the light of a small lamp:


This work has led me down all sorts of unexpected paths and I'm sure there are lots more unexplored ones. I feel this is the sort of work I will return to and the idea will be useful. For instance the final image reminds me of sharp wire and the red colour of blood. I've watched the National Theatre Live production of War Horse recently and watched some of the WW1 programmes on the TV so the imagery is high in my consciousness just now.
No comments:
Post a Comment