Friday 23 May 2014

Part 5 Personal Project Stage 3


After the frustrations of the last few days I've decided to put my window idea to one side.  I've learnt that fighting an idea is very different to being challenged by one.

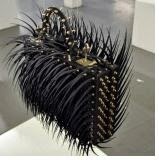
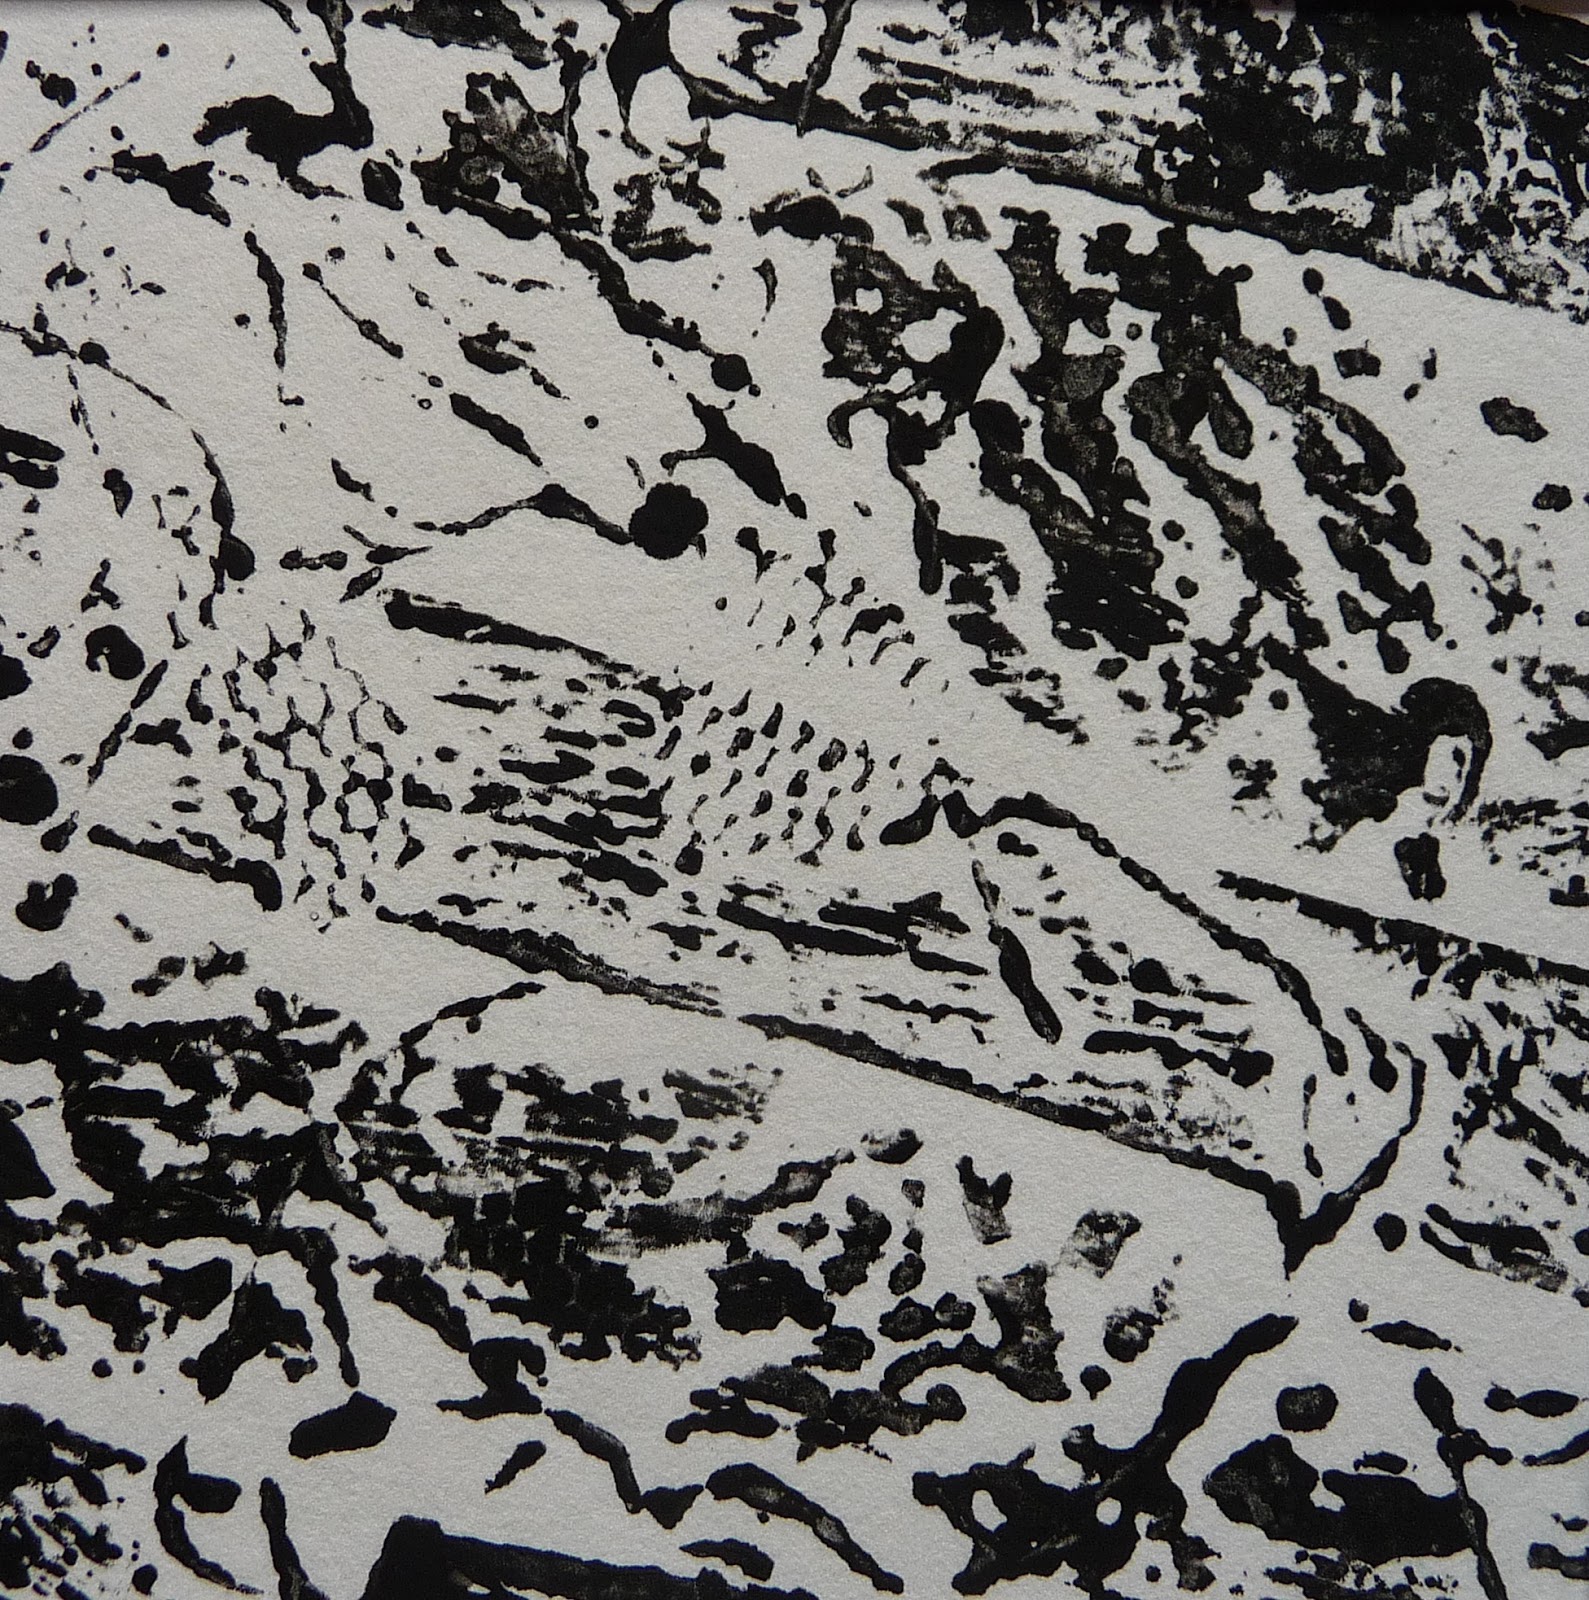
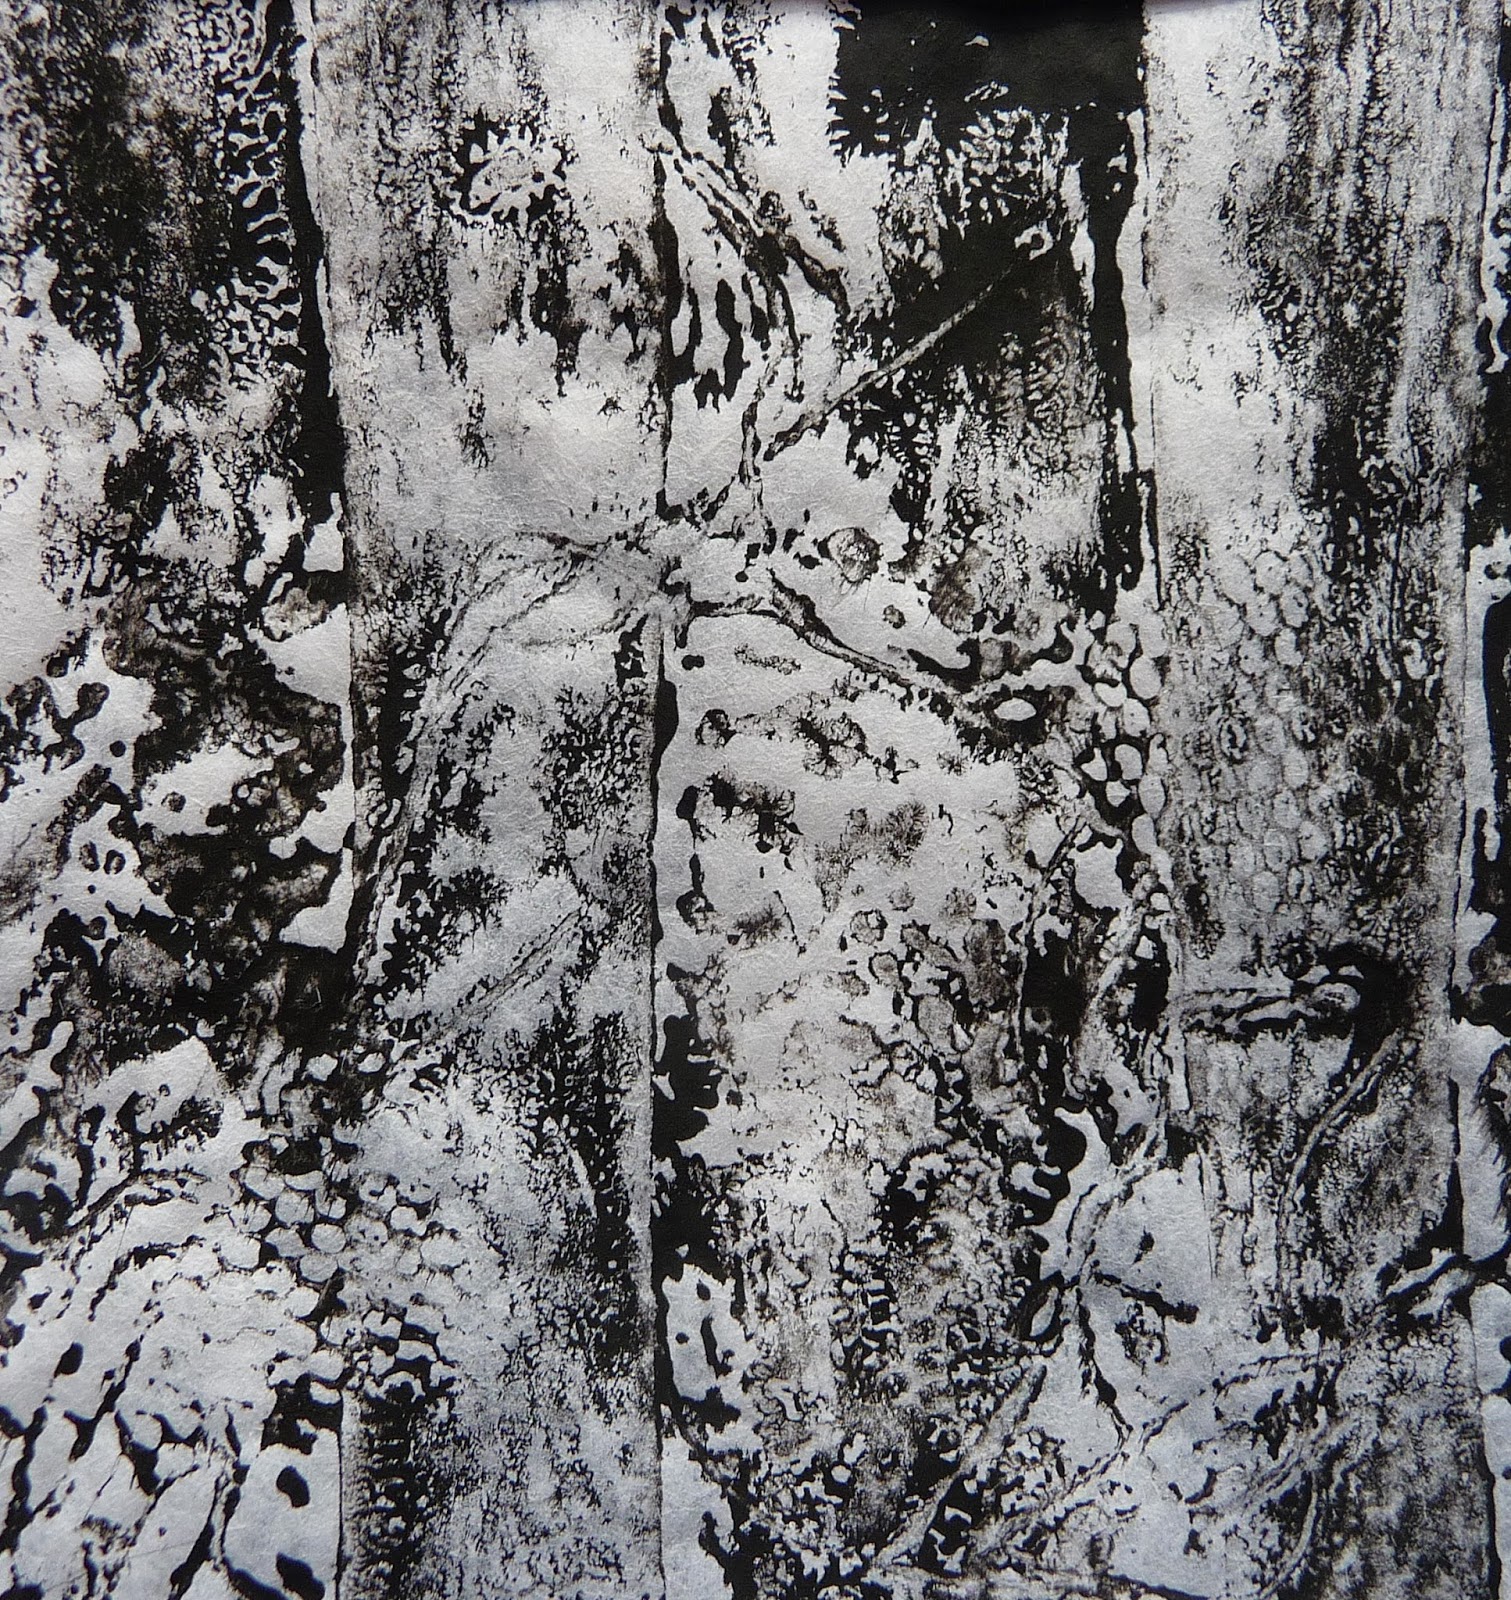
I'm going to take one of the simpler collograph images and make a black and white (and tones) image with paper.  My starting point is this and I'm still looking for a bit of mystery:


My starting point

I started by laying strips of torn newspaper vertically in my sketchbook (A3).  I painted some bondaweb grey but felt it was too wet so I put a tissue  on to soak up some of the excess moisture.  It looked lovely and fitted what I wanted to show:

Tissue with excess paint
I split the 3 ply tissue into separate layers and put them over the newspaper.  I continued to introduce new materials - the painted bondaweb torn into strips and laid horizontally and vertically, white organza on the bondaweb, some thin polystyrene that went shiny when melted.  The only thing I came to regret was the black material (explained later).


Part of my finished work - the tissue worked well at creating mystery

I thought this might back a good background on fabric so I printed it on bondaweb and put it on some white cotton.  I feel pretty resistant to working on white but I needed to try it out. This is the result:


This shows the colour change
even green on the unwanted dark shape

It printed in a sort of sepia which certainly isn't what I wanted.  I changed some of the colour settings but it was no better.  I found the central black shape didn't fit the background function very well - it was far too prominent.

As I cast around for suitable materials to try I raided the thin outer layer of the silver birch in the garden.  It cleaned up well with baby wipes and transferred to fabric using the ever present bondaweb:


It seems that if I want to use monochrome I'll have to apply paint directly onto my fabric in some way.

Something happened in my head overnight because I'm going to try some felting with some inclusions.

If I'm felting my first port of call is always The Art of Felt by Francoise Tellier Loumagne (2008).  In this book there's some background information about the felting process but the main reason I look at it is for inspiration.  The theme of her pieces is the changing sky and she explores the ways that it can be represented in felt.  She gives illustrations of how an effect is achieved.  This is called The Oncoming Storm:


The Oncoming Storm
Francoise  Loumagne


Using black mesh as a base, tuft with black wool fibre


Repeat with a paler shade of wool


Use a sewing machine to embroider swirling lines, adding detail to the design and making it more dense.


This one is called Bright spell and it is done using lightly gathered, printed net that is needle felted from both sides:

Bright spell - Francoise Tellier Loumagne

The whole book is full to bursting with such gems so suitably inspired I gathered together some materials in the right colours and with lots of textures.


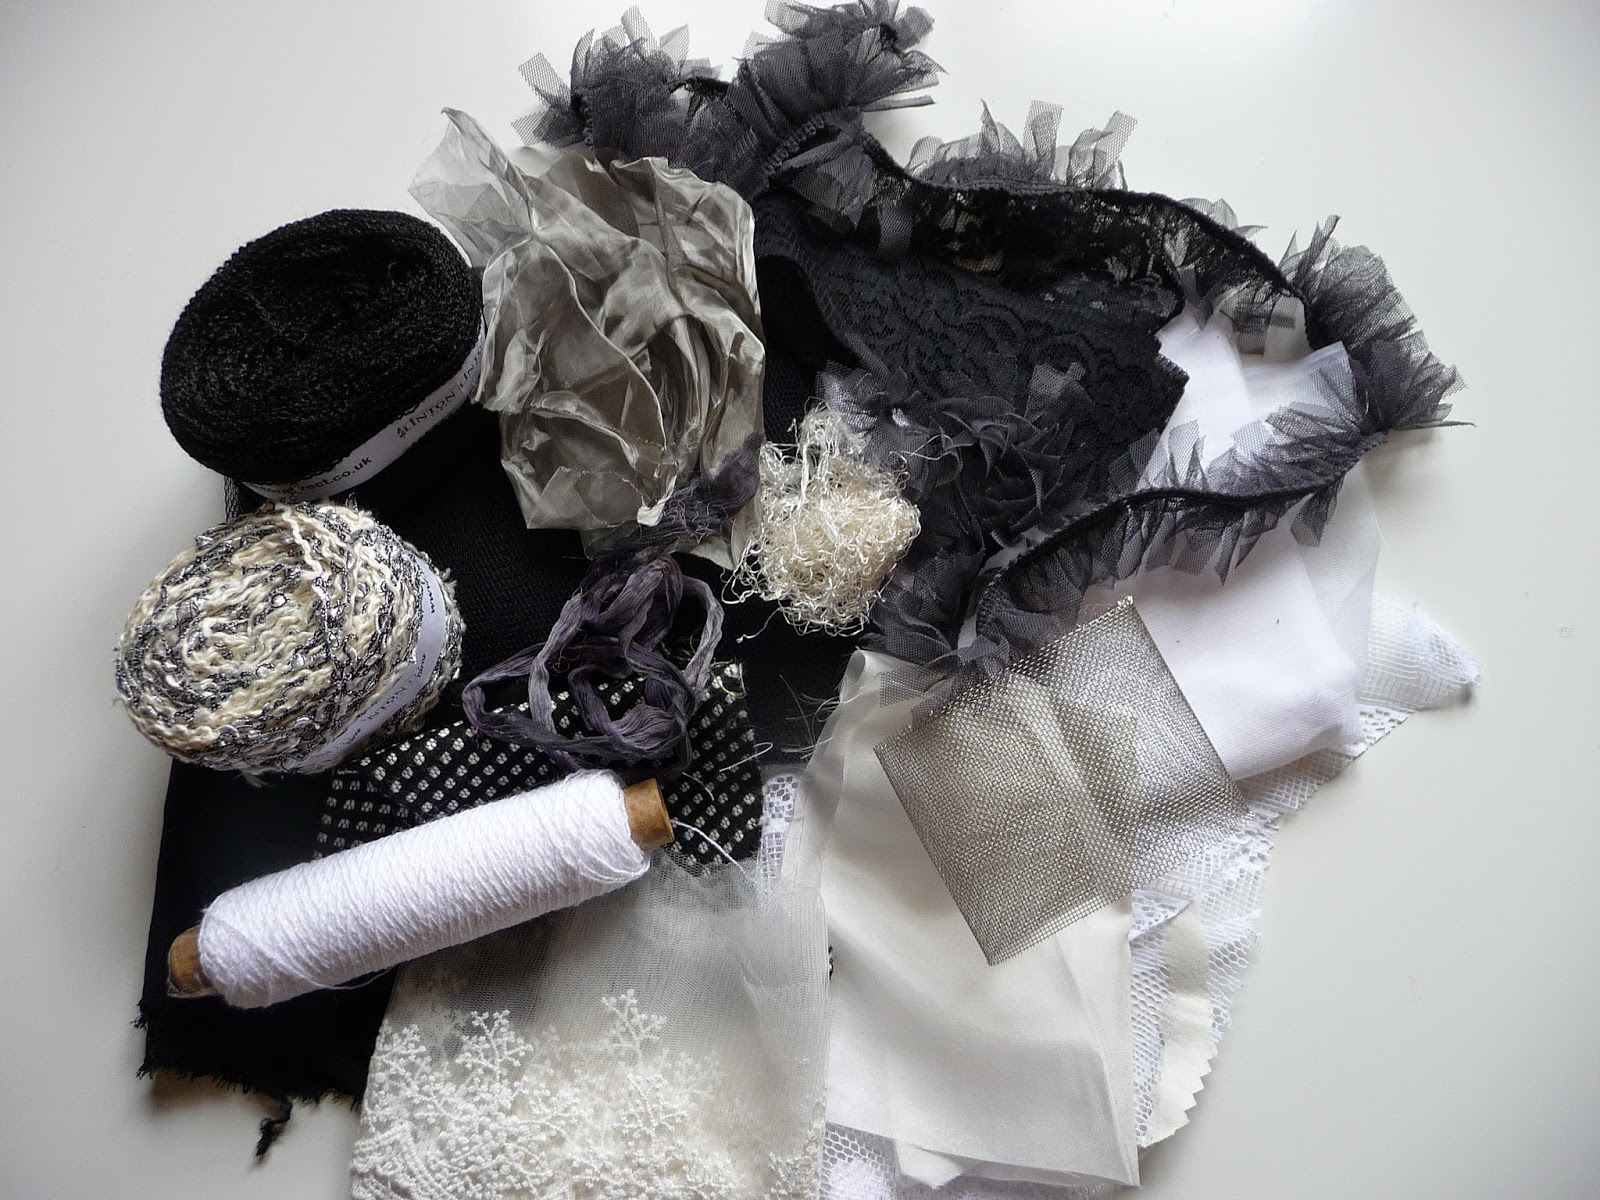
Yarns, fine steel mesh, lace, net, silk, throwsters waste to choose from.

I did the same with my tops (the darker of these is some Herdwick fleece I was given and it is pretty rough).  The stripy one is quite silky. :


I wanted to see if including wire would make a fabric I could manipulate so I knitted a small piece of wire mesh:


I wanted my felt to be quite soft and textural, there is no need for it to be robust.  Between the second and third layers I put a variety of my materials simply to see how they performed.


Net curtain - probably the most successful

Black yarn
A black, crinkly yarn


My knitted wire - it wasn't strong enough to hold a shape
but gave a good texture


Grey net, one, two and three layers thick - worked well


It seems as though it's possible to get good colour variations with inclusions and without being too heavy handed with dark merino tops which I find are fairly unpredictable.

Here's the great irony:  all these photos were taken with the felt held to the window!  Laid flat on the table it all looked very, very bland.  Perhaps the inclusions that need to be prominent would be best laid on the top of the wool.


Laid flat the felt looks very bland


Maybe I'll get my window piece after all!

Tellier-Loumagne (2008) inspires experimentation so I tried dry felting into some commercial mesh:


My mesh


Dry felting both front.....

...and back
I like the way the wire shows a little but it still doesn't hold it's shape.  I don't think this is very important right now but it's valuable knowledge.

I tried the same thing with net curtain as my base and it was possible to follow a shape very closely.


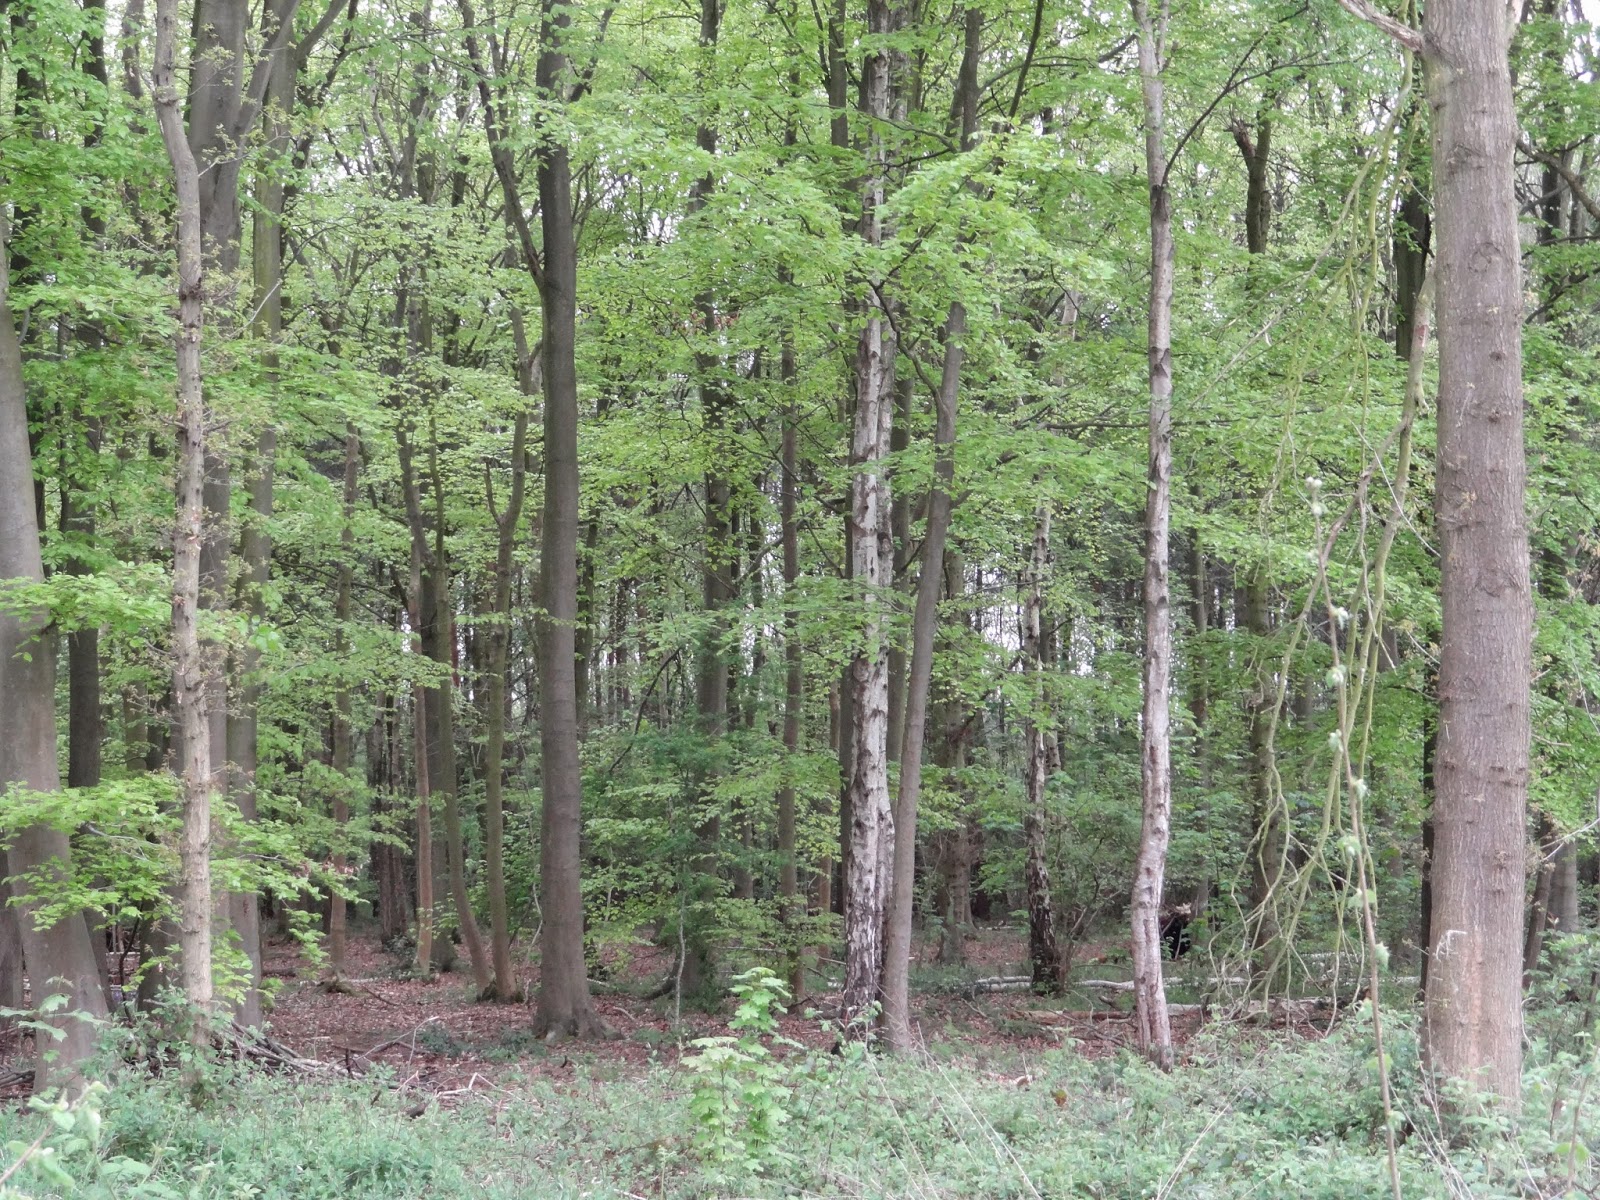
I've been working on how to interpret the tree trunks.  I painted three pieces of  bondaweb, a white, a grey and a black and I tore them into smaller fragments and placed them at random on organza.

Painted bondaweb on organza

It looked promising so I tried it on four different backgrounds

Black silk

Black net

Fine steel mesh

White silk


The photos don't show these samples very well because they look quite delicate but the silk and the steel are quite lovely although for my purposes the white silk works best.


I've returned to the collograph image I used earlier in this post and I've changed the proportions to better reflect the long thin nature of the tree trunks.  I used Word to do this and it will form the basis of my design.  I'm going to play with one, two or three trunks and pick and choose the shapes around them.


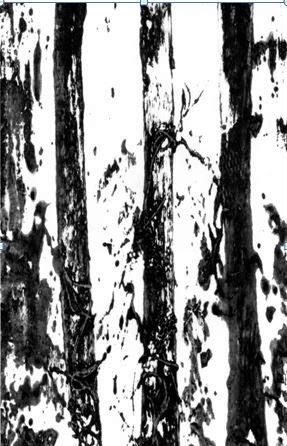
The basis of my design

Meantime I've dyed some of my white materials black.

I've been on a bit of a roll today (at last).  I've made some lighter weight felt and included only white throwsters waste - in quantity - and it's turned out well.  It has all the qualities I'm looking for.  It's a bit mysterious, ethereal and quite calm.  Against the window it looks lovely.

My silky felt

I used my fabrics to create a collage that I plan to cut up and use as my tree trunks.

The start of my monochrome  collage
I added strips of painted bondaweb and then put one layer of organza on top and the effect has the feeling I want.

With painted bondaweb and organza

Each tree trunk will be inevitably different.  I'll cut into the fabric tomorrow.


Tellier-Loumagne, F.  (2008)  The Art of Felt.  Thames and Hudson

Saturday 10 May 2014

Part 5 Exhibition at The Harley Gallery


Added Value ? is a British Crafts Council Touring Exhibition. 

The key thing about this exhibition is the question mark.  The exhibition poses a series of thought provoking questions and asks precisely what adds value to items we choose to buy.  Taken from the catalogue the essential queries are:

...is craft a new language for luxury?
Does bespoke offer greater value than off-the-peg?
What is the relationship between skill and value?
Does the skill of the maker's hand have greater worth than the cogs of a machine?
What is the relationship between craft, value and experience?
What makes an items valuable?
Does craft give back to luxury brands what mass production and replication take away?

These questions make the "is craft art?" debate look easy!

In his introduction to the catalogue Bruce Montgomery, Professor in Design Craftsmanship at Northumbria University, says

If we are to avoid drowning in an endless stream of bland products, a new approach is required.  We must add value, create luxury, and engage the consumer through skills, materials and experiences that produce higher value goods with cutting edge appeal.

He suggests that in order to distinguish oneself from the high street one has to go up market to the designer brands and therein lies value, taste and style.  In this context designers make great efforts to be associated with craftsmanship in order to enhance the brand validity.

Montgomery goes on to say 

Craft skills and crafted products are increasingly crucial to our understanding of what is luxurious. Unique, irreplaceable crafted products allow us to see that taste is about more than money.

What I don't quite understand is how individually crafted items can be so blithely dissociated from monetary cost.

For me the artists who were involved in this exhibition were somewhat overshadowed by the philosophical side of things.  However the work shown was unusual and interesting.

carreducker "create custom made shoes for men, traditionally made and designed with a contemporary aesthetic to suit each clients individual style"


http://carreducker.com/bespoke-shoes

Oliver Ruuger is an Estonian born designer working in London.  He produces highly innovative accessories which have their basis in a traditional function, for example umbrellas or briefcases.

http://www.notjustalabel.com/oliver_ruuger


Bompas and Parr were founded in 2007 and have developed a business in food art.  Their creations are all gelatin based and can be quite spectacular:

sweet-station.com

Theu use cutting edge technology including 3D printing to create their moulds.

Zoe Arnold mixes recycled and precious materials to create a variety of art objects.

http://zoearnold.com
silver, coral and lava beads

Simon Hasan has reinvigorated the ancient tradition of boiling leather to create a hard material to make furniture and other unique objects.

www.dezeen.co.

Tracey Kendall is a maker of bespoke wallpapers which are both inventive and eccentric.  The one featured in the exhibition is made of sequins:

http://www.tracykendall.com

The exhibition has been successful as far as I'm concerned because it has raised questions I didn't know existed and provoked debate at home.  As for answers to the questions - well some are pretty uncomfortable for someone who wasn't born with a silver spoon in her mouth.


The website has much more information and I can promise it will make you think.
http://addedvalue.org.uk/guide


Monday 5 May 2014

Part 5 Personal Project Stage 2

Sketchbooks and portfolio work


I have so much material it's hard to know where to start.  However, during Part 4 I spent an afternoon in Sherwood Forest and some good images came out of that. They were mainly dead trees and some close up shots of shapes I used some in my Part 3 work.  There were one or two that showed trees at a distance and a couple of those have caught my eye.


Sherwood Forest


Although some of the trees aren't silver birch they all have the long thin trunks we associate with them.  I'm reminded of the work I did earlier about stripes and also some of my first screen printing using masking tape:


I think with particular placement this technique could be used as a basis for tree trunks.


I've been looking at other portrayals of tree trunks at a distance, silver birch particularly and some are truly lovely.

David Hockney's love of trees is legendary:

David Hockney at the Royal Academy
with his painting The Arrival of Spring in Woldgate
www.thetimes.co.uk


http://www.dailymail.co.uk/ 15 February 2011


A different and very seasonal bluebell twist:


Silver Birch 7 by Jan Rippingham

theartonlinegallery.com


Jan Rippingham  paints silver birch often through the seasons:

Autumnal silver birch 4 by Jan Rippingham
theonlineartgallery.com


Frank Bowling RA Silver Birch, 1985
Acrylic on canvas 70 x 96 inches

http://rolloart.com/


Frank Bowling's work makes me think of an effect I can get on the computer:


This is my photograph using the emboss effect on Paint.net.  Although it looks effective on the screen when I printed it - well lets say it just didn't work, it was just a mass of grey.  I'm not sure whether I can digitally colour this but I'll have a try.  (Alas, I didn't manage it, but as I become more proficient at the programme it may be possible.)

I'm sure the reason the image didn't print well is because it isn't actually in relief -  a bit of twig collage and some papier mache might be the way to go.


There are lots of ways to be inspired by the beautiful silver birch tree markings


Silver birch brocade highline dress
Alexander Lewis
www,avenue32.com


Silver birch Galena trousers
Alexander Lewis
www.avenue32.com


Until you get close to silver birch you don't realise that they have so many dark marking on them and they are quite dirty:


I think the big danger with silver birch images is that they can pretty soon become bucolic.

I've been working in my sketchbook and I was going to stick in a large copy of the first image in this post.  I turned it over to apply tape and the underside was just beautiful so I put tape on the front instead!


It's like being in a dream.

I've also had a first go at drawing using Paint.net with less impressive results:


I think this way to draw has great possibilities but I've a good way to go before I stop making lollipop trees.

I'm going to try a collograph working from the same image.  I don't have any printing ink so I've made some 3x3 samples to see what will work best.  I've used cut out shapes, cut into shapes, tile adhesive, sawdust and wood shavings to try to get a variety of textures.  I've only done this once before and then I covered the plate with PVA so it could be cleaned.  I have no printing inks so I'm not sure what medium I'll be using.  I'll do two coats of PVA this time as well.


Prior to PVA


These are the results:

Acrylic paint gave the sharpest result
Selecticine fabric dye with thickener didn't pick up the shapes at all

PVA and procion dye just pulled when I lifted the plate

The final one was household emulsion paint which thankfully got lost in translation.

The best result by far was from the acrylic paint and that's what I planned to use.  Geographically I'm not well placed to get things like printing ink but I happened to come across some Adigraf water based ink.  My previous experience was with oil based ink so I didn't know what to expect and how to use it.

I made a plate using mounting card as my base and covered it in PVA back and front.  I used cut card, textured wallpaper, tile adhesive and bits of net, scrim and cotton.  The fabric was stuck on with household emulsion.


My plate


The ink came out of the tube rather thicker than toothpaste or tomato puree and wouldn't spread so I diluted it with some water to the consistency of double cream.  In my other collograph experience the oil based ink needed to be wiped of and burnished before printing but when I tried this it just took all the ink away so I had to re apply it.

I have no press so my first print was done using just my hands to press the thick paper into the plate.

Using my hands as a press (1)

This is a very detailed print and some of the constituents are easily identifiable like the net and the strands of cotton.  The woods look a complicated place, not light and airy.

Without re inking I took another print and used my rolling pin:

Using a rolling pin as a press (2)

This gave a very different look.  The trees look more solid and the open space between the trees is more evident.  This looks far more light and airy.


I re inked and used a combination of the two; hands first then the rolling pin:


Hands and rolling pin as a press (3)

This is the deep, dark forest with the real possibility of a Gruffalo, Ents and certainly a bear hunt. It is definitely nothing like the wood where I took the photo.

I hadn't any more decent paper to hand and some ink left on the plate so I grabbed a sheet of tissue that had protected some acetate sheets and the result was amazing;

My hands as a press on tissue paper (4)

This had the misty, dreaminess of the reverse image.  There's lots of detail but little of the blackness evident previously.  Maybe because it was such a surprise this is my favourite.

I didn't wash my plate because the PVA was starting to break down which was no great surprise as my ink was water based.  This is how it looks after it's hard work:

The well used plate


I used my viewing frame and got some interesting images:


From print (1)


From print (1)


From print (2)
But best of all:


I like this because it captures the misty, dreamy quality that appeals to me.  I feel unsure how to pursue this but I've found that letting things lie around for a while often helps the process.

In the meantime I thought I'd make a final use of my plate by doing a tissue paper collage hoping that some of the textures would come through.  Except for the foil trees they didn't but nevertheless I think it's a good use for redundant plate.

My plate covered with tissue and foil

Somehow the positive and negative get mixed up as I look at this work.  This is much better viewed from a distance - the forest floor looks littered with flowers and the remains of the ink, whilst black seem not to make to dark and forbidding an image.  Is it attractive, yes, ethereal, I think not.

I was reminded of my work using light as an aid to mood and wondered if I could do a collage on transparent plastic.  I was thinking of stained glass and to that end I used the shape of a window pane as a basis.  This, of course, changed the proportion of my image.  I used aluminium foil that I embossed using a bumpy slate tile and I glued it onto the plastic sheet.  I then used organza bits to go from a colourful forest floor to a pale sky.  I put some darker net fragments into sky but it didn't work at all.  I also included some climbing plants in the form of novelty wool - no, no, no.  It would have been much better to have included further embossing maybe with some wire laid across the tile at the appropriate angles.  Additionally, the more square shape was wrong; the image needs to be long and thin like the trees.

Organza and foil on transparent plastic held against a window

Organza and foil on transparent plastic on a white table

The colours got a bit lost against the window but on the table they were much better defined.  I think I want to pursue this idea but I need to work some things out:

  • how to keep the ethereal quality and have some depth of colour - look at how many layers work best
  • what to stitch onto; can I just use organza or is it best to use lawn and then cut away unwanted fabric
  • what to use for the trees; foil is too delicate to be stitched; maybe some thicker aluminium sheet
  • how be to get the impression of creeping vines up the tree
  • with a (probably) limited palette how to create texture
  • this will probably be site specific so determine if not the size at least the proportion
It looks like sample time.
 
Well it did!

I became very frustrated messing about with Bondaweb and organza.  My basic rule is that if I'm not enjoying what I do I stop and take stock.  I've done just that and I'm going back to the drawing board.  I plan to use the same basic image but forget about transparent.  What a frustrating day.